Launched Effect
Have you ever wanted your app to do something automatically when it starts up? Maybe load some data from the internet, or start a timer? That's where LaunchedEffect comes in! It's like telling your app "Hey, when this screen appears, do this thing for me!" We'll learn how to use LaunchedEffect to make your apps more dynamic and responsive.
Quick Reference
| Command/Topic | Description | Common Use |
|---|---|---|
| LaunchedEffect(Unit) | Runs code once when composable appears | Initial setup, one-time tasks |
| LaunchedEffect(key) | Runs code when key value changes | Responding to data changes |
| delay() | Pauses execution for a time | Creating timers, loading delays |
When to Use LaunchedEffect
- When you need to load data when a screen appears
- To start timers or animations automatically
- When subscribing to data updates
- For any task that needs to happen automatically
- When you need to perform side effects in your composable
Common Options
| Option | What It Does | When to Use It |
|---|---|---|
| Unit key (uses the unit keyword) | Runs effect once when composable appears | For one-time setup tasks |
| Variable key (uses the variable name) | Runs effect when variable changes | For reactive tasks |
| delay() | Pauses execution | For timing-based tasks |
Practical Examples
Basic Welcome Screen
This example shows how to run code when a screen first appears. In the example below, the WelcomeScreen Composable function combines the functionality of printing a message to the console (println) for internal logging or debugging purposes and displaying a welcome message to the user (Text) on the screen. The LaunchedEffect is used for side effects, while the Text Composable is used for rendering UI elements.
@Composable
fun WelcomeScreen() {
    // This will run when the screen first appears
    LaunchedEffect(Unit) {
        // This code runs automatically when the screen starts
        println("Welcome to my app!")
    }

    Text("Welcome to my app!")
}
What This Example Is Doing
WelcomeScreen runs two things when the screen appears: (1) LaunchedEffect(Unit) runs once and prints "Welcome to my app!" to the log (for debugging). (2) The Text composable shows "Welcome to my app!" on the screen. The Unit key means the effect runs only when the composable first enters the composition—it does not run again on recomposition. So you get one-time setup (the println) plus the visible UI.
Reactive Counter with Effect
This example shows how to use LaunchedEffect to respond to changes in your app. Think of it like a smart counter that logs every change.
@Composable
fun CounterWithEffect() {
    var count by remember { mutableStateOf(0) }

    // This effect runs whenever count changes
    LaunchedEffect(count) {
        println("Count changed to: $count")
    }

    Column {
        Text("Count: $count")
        Button(onClick = { count++ }) {
            Text("Add One")
        }
    }
}
What This Example Is Doing
CounterWithEffect keeps count in state and shows a column with the count and an "Add One" button. LaunchedEffect(count) uses count as the key: every time count changes (e.g. when you tap the button), the effect runs again and prints "Count changed to: …" to the log. So the effect reacts to state changes instead of running only once.
Common Use Cases
Here are some practical ways to use LaunchedEffect in your apps:
Loading User Data
@Composable
fun UserProfile(userId: String) {
    var userData by remember { mutableStateOf("") }

    LaunchedEffect(userId) {
        // Load user data when the screen starts
        userData = loadUserData(userId)
    }

    Text(userData)
}
What This Example Is Doing
UserProfile takes a userId and keeps userData in state. LaunchedEffect(userId) runs when the composable first appears and whenever userId changes. Inside the effect, it calls loadUserData(userId) (e.g. a network or database call), sets the result into userData, and the Text shows it. So when the user navigates to a different profile, the key changes and the effect loads that user's data.
Creating a Timer
@Composable
fun TimerWithButton() {
    var time by remember { mutableStateOf(0) }
    var isTimerRunning by remember { mutableStateOf(false) }

    /* Launched effect will run whenever isTimerRunning value is changed so when it is true
    the while loop will engage and keeps running incrementing time.  When false LaunchedEffect will
    stop thus stopping the while loop*/
    LaunchedEffect(isTimerRunning) {
        while (isTimerRunning) {
            delay(1000) // Wait 1 second
            time++
        }
    }

    Column(
        horizontalAlignment = Alignment.CenterHorizontally,
        verticalArrangement = Arrangement.Center
    ) {
        Text("Time: $time seconds")
        Button(
            onClick = { isTimerRunning = !isTimerRunning }
        ) {
            Text(if (isTimerRunning) "Stop Timer" else "Start Timer")
        }
    }
}
What This Example Is Doing
TimerWithButton keeps time (seconds) and isTimerRunning in state. The button toggles isTimerRunning and its label switches between "Start Timer" and "Stop Timer." LaunchedEffect(isTimerRunning) runs when that value changes. When isTimerRunning is true, the effect enters a while loop that waits 1 second (delay(1000)), increments time, and repeats. When you tap "Stop Timer," isTimerRunning becomes false, the effect is cancelled, and the loop stops—so the timer only runs while the effect is active.
Subscribing to Updates
@Composable
fun WeatherWidget() {
    var temperature by remember { mutableStateOf(0) }

    LaunchedEffect(Unit) {
        // Subscribe to weather updates
        weatherUpdates.collect { update ->
            temperature = update.temperature
        }
    }

    Text("Temperature: $temperature°C")
}
What This Example Is Doing
WeatherWidget keeps temperature in state. LaunchedEffect(Unit) runs once when the composable appears and subscribes to weatherUpdates (e.g. a flow or channel). Each time an update is received, it sets temperature = update.temperature, which triggers recomposition so the Text shows the new value. So the widget stays updated as new data arrives.
Loading Screen with Effect
This example demonstrates how to use LaunchedEffect to create a loading screen that automatically transitions to show data. Think of it like a loading screen in a game that shows while content is being prepared.
@Composable
fun LoadingScreen() {
    // State to remember if we're loading
    var isLoading by remember { mutableStateOf(true) }
    // State to remember our loaded data
    var message by remember { mutableStateOf("") }

    // This LaunchedEffect runs when the screen starts
    LaunchedEffect(Unit) {
        // Simulate loading some data
        delay(2000) // Wait for 2 seconds
        message = "Data loaded successfully!"
        isLoading = false
    }

    Column(
        modifier = Modifier.fillMaxSize(),
        horizontalAlignment = Alignment.CenterHorizontally,
        verticalArrangement = Arrangement.Center
    ) {
        if (isLoading) {
            CircularProgressIndicator()
            Text("Loading...")
        } else {
            Text(message)
        }
    }
}
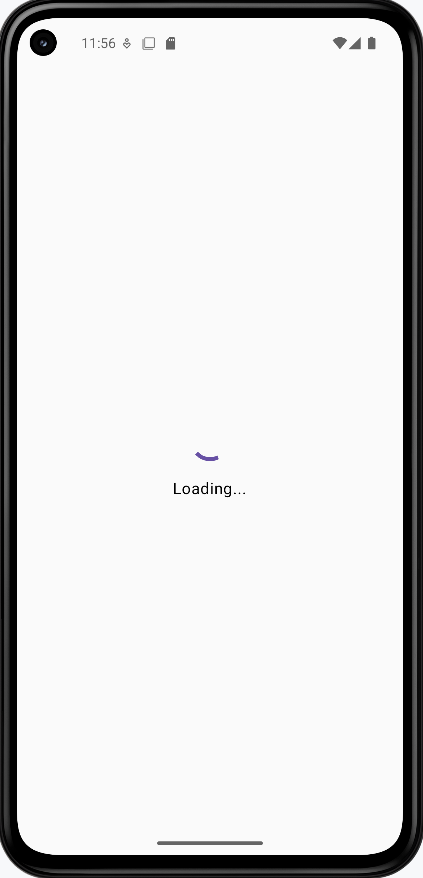
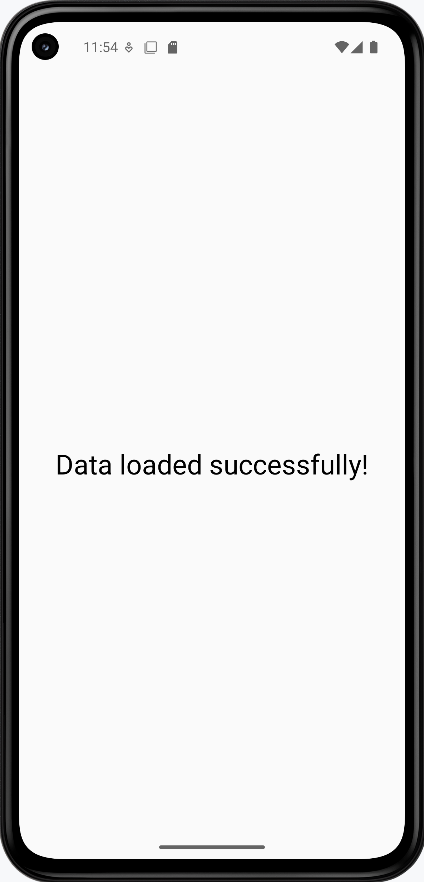
What This Example Is Doing
LoadingScreen keeps isLoading (initially true) and message (initially empty) in state. LaunchedEffect(Unit) runs once when the screen appears: it waits 2 seconds with delay(2000), sets message = "Data loaded successfully!", and sets isLoading = false. While loading, the UI shows a CircularProgressIndicator and "Loading..."; after the delay, it shows the message. So you get a simple simulated loading flow that switches to content automatically.
How these examples render
The images below show what the LaunchedEffect examples look like when you run them (e.g. the welcome screen, the counter with effect logging, or the loading screen before and after the delay). The snippets above are only part of the code; to see and run the full project, go to my GitHub page and open the chapter6 launchedEffect.kt file.
Learning Aids
Tips for Success
- Choose your key wisely - it determines when the effect runs
- Keep effects simple and focused on one task
- Remember to clean up resources when needed
- Use meaningful names for your effects
Common Mistakes to Avoid
- Using the wrong key for your effect
- Creating infinite loops without proper cleanup
- Putting too much logic in a single effect
- Forgetting to handle errors in effects
Best Practices
- Keep effects simple and focused
- Clean up resources when the composable disappears
- Use appropriate keys for your use case
- Handle errors gracefully in your effects