UI Separation: Logic vs View
Introduction
When building modern apps, one of the most important principles is separating your app's logic from its view (UI). Think of it like a restaurant: the kitchen (logic) prepares the food, while the dining area (view) serves it to customers. They work together but have different responsibilities. In app development, this separation means keeping the code that decides what your app does (logic) separate from the code that decides how it looks (view). This separation makes your code easier to read, test, and modify later. In Jetpack Compose, we use ViewModels to help maintain this clear separation.
Why Separate Logic from View?
Imagine trying to cook a meal in the middle of your dining room. It would be messy, confusing, and hard to manage. The same applies to mixing UI code with business logic. By keeping them separate, we gain several important benefits:
First, it makes your code much easier to understand. When you look at a file, you immediately know whether it's responsible for how things look or how things work. This clarity is especially valuable when working in teams, as different developers can focus on different aspects of the app without stepping on each other's toes.
Second, this separation makes testing much more straightforward. You can test your business logic without needing to run the entire app or deal with UI elements. This means faster tests and more reliable code. It also makes it easier to modify either the UI or the logic without breaking the other part.
Understanding the Components
Let's break down the main components of this separation:
The View (UI) is like the front of the house in a restaurant. It's what users see and interact with. In your app, this includes all the composables, layouts, buttons, and other visual elements. The view's job is to display information and handle user input, like button clicks or text entry. It should be focused on how things look and feel to the user.
The Logic is like the kitchen in a restaurant. It's where the real work happens, but users don't see it directly. This includes all the calculations, data updates, and business rules that make your app function. The logic decides what should happen when a user performs an action, but it doesn't care about how that action is presented to the user.
The ViewModel acts as the bridge between these two components. Think of it as the server in a restaurant, taking orders from the dining area to the kitchen and bringing the prepared food back to the customers. In your app, the ViewModel holds your logic and data, and provides it to the UI in a way that's easy to use.
File Organization
Just as we separate logic from view, we should also separate our files. Let's look at how to organize files for a simple counter app in two different scenarios:
Scenario 1: Counter with ViewModel (for shared/persistent state)
app/
├── screens/
│   └── CounterScreen.kt    // Contains the @Composable function
└── viewmodels/
    └── CounterViewModel.kt // Contains the ViewModel class
This organization:
- Separates UI concerns from business logic and state that needs to persist across configuration changes.
- Leverages the Android ViewModel to manage lifecycle-aware data.
- Facilitates sharing state between multiple composables or screens.
- Adheres to the single responsibility principle.
Scenario 2: Counter with Local State (separated files)
app/
└── screens/
    ├── CounterScreen.kt    // Contains the @Composable function
    └── CounterLogic.kt     // Contains the local state logic
This organization:
- Keeps UI concerns separate from state management logic, even for local state.
- Allows for independent testing of the logic.
- Promotes reusability of the logic in other composables if needed.
- Adheres to the single responsibility principle.
Practical Example
Let's see how to implement a counter in both ways. Notice the required imports for each approach. Note I am just showing the required imports for each approach, obviously you will need to import other things as well:
1. Counter with ViewModel (for shared/persistent state)
// CounterViewModel.kt
class CounterViewModel : ViewModel() {
var count by mutableStateOf(0)
private set
fun increment() { count++ }
}
// CounterScreen.kt
//These imports are required for the ViewModel approach
import androidx.compose.runtime.Composable
import androidx.lifecycle.viewmodel.compose.viewModel
@Composable
fun CounterScreen(
viewModel: CounterViewModel = viewModel()
) {
Column {
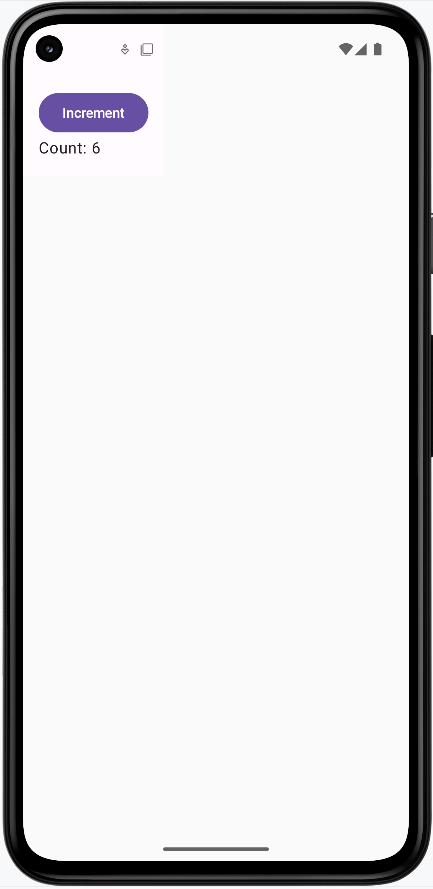
Text("Count: ${viewModel.count}")
Button(onClick = { viewModel.increment() }) {
Text("Increment")
}
}
}This approach is best when:
- You need the count to survive screen rotations
- The count needs to be shared between multiple composables
- You want to keep the business logic separate from the UI
2. Counter with Local State (separated files)
// CounterLogic.kt

class CounterLogic {
    var count by mutableStateOf(0)
        private set
    fun increment() { count++ }
}

// CounterScreen.kt
//These imports are required for the local state approach
//NOTE: Because CounterLogic.kt is (in this example) in the same package (folder) as CounterScreen.kt, we do not need to import it.
import androidx.compose.runtime.Composable
import androidx.compose.runtime.remember

@Composable
fun CounterScreen() {
    // Create local state logic
    val counterLogic = remember { CounterLogic() }

    Column {
        Text("Count: ${counterLogic.count}")
        Button(onClick = { counterLogic.increment() }) {
            Text("Increment")
        }
    }
}
This approach is best when:
- The count is only needed in this one composable
- The count doesn't need to persist across configuration changes
- You want to keep the logic separate from the UI, even for local state
Note about imports: The imports shown above are essential for each approach to work. The ViewModel approach needs the lifecycle and viewmodel imports, while the local state approach needs the compose runtime imports. Make sure to include these in your actual code.
How the Connections Work
You might be wondering how the composables know about and connect to their logic classes. Let's explain how each approach works:
ViewModel Connection
In the ViewModel approach, the connection between CounterScreen and CounterViewModel is managed by the Android framework:
- The
viewModel()function (fromandroidx.lifecycle.viewmodel.compose.viewModel) automatically creates or retrieves a ViewModel instance - When
CounterScreencallsviewModel(), it either:- Gets an existing ViewModel if one was already created for this screen
- Creates a new ViewModel if this is the first time the screen is shown
- This is why we use
viewModel: CounterViewModel = viewModel()as a default parameter - The Android framework handles all the lifecycle management, ensuring the ViewModel survives configuration changes
Local State Connection
In the local state approach, the connection between CounterScreen and CounterLogic is simpler but still managed by Compose:
- The
rememberfunction creates and remembers aCounterLogicinstance - When
CounterScreencallsremember { CounterLogic() }, it:- Creates a new
CounterLogicinstance the first time the composable runs - Returns the same instance on subsequent recompositions
- Creates a new
- This ensures the state persists as long as the composable is in the composition, but critically, **this state is lost when the composable is removed from the composition (e.g., due to a screen rotation or navigation away)**.
- Furthermore, each instance of a composable using
remember { CounterLogic() }will create its own independentCounterLogicinstance, meaning **this state cannot be directly shared between multiple composables without manual passing**.
The key difference is that ViewModels are managed by the Android framework and are designed to survive configuration changes and be easily shared across multiple composables within the same scope. In contrast, local state managed by Compose's remember function only lives as long as the composable is in the composition and is not inherently shareable. This is why we use ViewModels for important, shared, or persistent data, and local state for temporary, UI-specific data that doesn't need to survive configuration changes or be shared.
You can see complete example of both approaches on my github page at the GitHub site. They are in chapter10 named CounterScreenViewModel and CounterScreenLocalState.
NOTE: Both examples output the same execpt only the main view model example persists the state across rotation and the local state example does not.
Managing State: Where Does It Belong?
One of the most important decisions in app development is deciding where to store your state (data that can change). In Jetpack Compose, you have two main options: storing state in a ViewModel or directly in a composable. This decision is crucial for building apps that are easy to understand and maintain.
When to Keep State in a ViewModel
- When you want the data to survive configuration changes (like screen rotation)
- When the state needs to be shared between multiple composables or screens
- When the data is part of your app's logic or business rules
- When the data needs to persist across navigation events
When to Keep State in a Composable
- When the data is only needed for a single composable
- When the state is temporary (like a text field's current value)
- When you don't need to share the data or keep it after the composable is gone
- When the state is purely UI-related (like animation states)
Separating Logic from View in Non-ViewModel Composables
Even when using local state in a composable, you can still choose to separate the logic from the view. Here's when to keep them together versus when to separate them:
When to Keep Logic in the Same File as the View:
- When the logic is very simple (like a single counter increment)
- When the logic is tightly coupled to the UI (like animation state)
- When the composable is small and self-contained
- When the logic is only used by this one composable
When to Separate Logic into Its Own File:
- When the logic becomes complex or has multiple operations
- When you want to make the logic reusable across different composables
- When the logic needs to be tested independently
- When the composable is large and the logic would make it harder to read
- When you want to maintain consistent separation of concerns throughout your app
Remember: Even though the state is local to a composable, separating the logic into its own file can still make your code more maintainable and testable. The key is to consider the complexity and reusability of your logic when making this decision.
Tips for Success
- Keep your composables focused on their primary responsibility: displaying data and handling user input
- Make composables simple and straightforward, mainly concerned with how things look and how users interact with them
- Put all complex business logic and data updates in your ViewModel
- Use ViewModel for important or shared data
- Use composable state for local, temporary, or UI-only data
- Don't be afraid to move state as your app grows—start simple!
Common Pitfalls to Avoid
- Mixing logic and UI code in the same function - this creates code that's hard to read, test, and modify
- Putting calculation logic directly in composable functions instead of the ViewModel
- Letting the UI directly change data instead of going through the ViewModel
- Keeping all state in the ViewModel (can make your code harder to manage)
- Putting important data in a composable when it should be in a ViewModel
- Forgetting that composable state is lost when the composable is removed
Best Practices
- Always keep your logic and view code in separate files
- Use ViewModels to manage your app's data and logic
- Keep composables focused solely on UI concerns
- Think about how long you need the data and who needs to use it
- Keep state as close as possible to where it's used, but as high as necessary
- Document where your state lives and why