
CPS251
Android Development
Customizing Material Components
Introduction
Sometimes you want a button, card, or other Material component to look a little different—maybe a warning button, a special card, or a unique color for a certain action. In Jetpack Compose, you can customize individual Material components without changing your whole app's theme.
When to Customize Material Components
- You want to highlight a specific action (like a danger or success button)
- You want to make one card or button stand out from the rest
- You want to experiment with different looks for certain UI elements
- You want to match a brand color for a special feature
Common Customizations
| Component | What You Can Change | How |
|---|---|---|
| Button | Colors, shape, elevation | Use colors, shape, elevation parameters |
| Card | Colors, shape, border | Use colors, shape, border parameters |
| TextField | Colors, shape | Use colors, shape parameters |
Where to find the actual parameters and values
The table above only names a few ideas. The real list of parameters lives on each composable in the Material3 library. Here is how students usually look them up:
- Android Studio — Type
Button(,Card(, orOutlinedTextField(and use parameter hints (the IDE shows each parameter name as you fill them in). Press Ctrl+P (Windows/Linux) or Cmd+P (Mac) inside the parentheses to see the full parameter list. Ctrl+Q (or F1) on a composable name opens quick documentation with a link to the full reference. - Official Compose Material3 reference — The Material3 package overview lists every component. Open the page for the widget you care about—for example Button, Card, or OutlinedTextField—and scroll to the function signature to see parameters like
colors,shape, andelevation(names vary by component). - Theme tokens — When you customize using
MaterialTheme.colorScheme.…,MaterialTheme.typography.…, orMaterialTheme.shapes.…, the names and roles of those slots are listed in this course’s Theme Reference (that page is about the theme, not every parameter on every component). ButtonDefaults,CardDefaults, etc. — Helpers likeButtonDefaults.buttonColors(…)live in the same Material3 library. In Android Studio, Ctrl+Click (or Cmd+Click) the name to jump to the source or to documentation and see what each argument does.
Practical Example
@Composable
fun CustomButtonExample() {
    Button(
        onClick = { /* Do something */ },
        colors = ButtonDefaults.buttonColors(containerColor = Color.Red),
        shape = RoundedCornerShape(50),
        elevation = ButtonDefaults.buttonElevation(12.dp)
    ) {
        Text("Danger!", color = Color.White)
    }
}
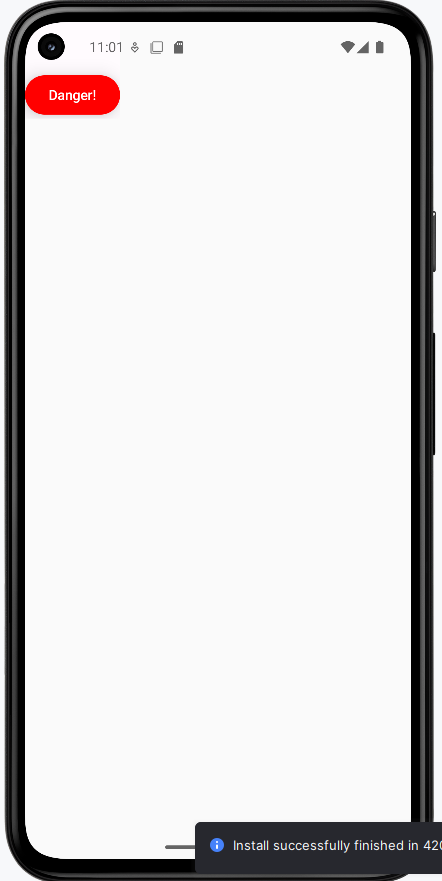
- This button uses a red background, pill shape, and higher elevation for emphasis
- You can customize any Material component in a similar way
How this example renders
Above is just a snippet of the code to view the full code, you need to go to my GitHub page and look at the chapter13 custom.kt file. When you run the code it will look like the example below.
Tips for Success
- Use custom styles sparingly—too many can make your app look messy
- Keep important actions (like delete) visually distinct
- Test custom components in both light and dark mode
Common Mistakes to Avoid
- Overusing custom styles so nothing stands out
- Using colors that clash with your theme
- Forgetting about accessibility (contrast, touch size)
Best Practices
- Base most of your UI on the theme, and only customize when needed
- Document why you use custom styles
- Keep customizations consistent across your app