Setting Up a Physical Device
Connecting Android Studio to a physical Android device for app development and testing can be a faster alternative to using an emulator, especially for performance-related aspects and features that rely on device hardware. You can connect your Android device via USB or wirelessly. This tutorial will guide you through the process, including enabling developer mode on your device.
Prerequisites
- Android Studio installed on your computer.
- An Android device.
- A USB cable (for USB connection).
- Both your computer and Android device must be connected to the same Wi-Fi network (for wireless connection).
Step 1: Enable Developer Options and USB Debugging
Before connecting your device to Android Studio, you must enable Developer Options and USB Debugging on your Android device.
- Open Settings on your Android device.
- About Phone: Scroll down and tap on "About Phone".
- Build Number: Find "Build number" and tap it 7 times. You will see a message that says "You are now a developer!".
- Return to the Settings Menu: Go back to the main settings menu and you should see "Developer options" now listed.
- Enable USB Debugging: Under "Developer options", scroll until you find "USB debugging" and enable it.
Step 2: Connect via USB
- Connect Your Device: Use a USB cable to connect your Android device to your computer.
- Check Connection: Once connected, your device might ask you to authorize the connection. Ensure that you allow it by accepting the prompt on your device screen to trust the computer.
- Verify in Android Studio: Open Android Studio, run your project, and select your device from the available devices dropdown list near the run button. If everything is set up correctly, your device should be listed there.
Step 3: Connect Wirelessly (Android 11+)
If you're using Android 11 or later, you can connect your device to Android Studio wirelessly.
- Initial USB Connection: First, connect your device to your computer via USB and make sure USB debugging is enabled.
- Open Terminal in Android Studio: Go to the bottom of Android Studio and open the terminal tab.
- Pair Device Wirelessly:
- Type
adb tcpip 5555and hit enter. This command will restart the ADB daemon in TCP mode on port 5555. - Find your device's IP address from Settings > About phone > Status > IP address.
- Type
adb connect <DEVICE_IP_ADDRESS>:5555replacing<DEVICE_IP_ADDRESS>with your actual IP address, then hit enter. - Disconnect the USB cable. If connected successfully, your device will still be connected over Wi-Fi.
- Type
- Verify Connection: Run your application in Android Studio and select your device from the target devices dropdown list.
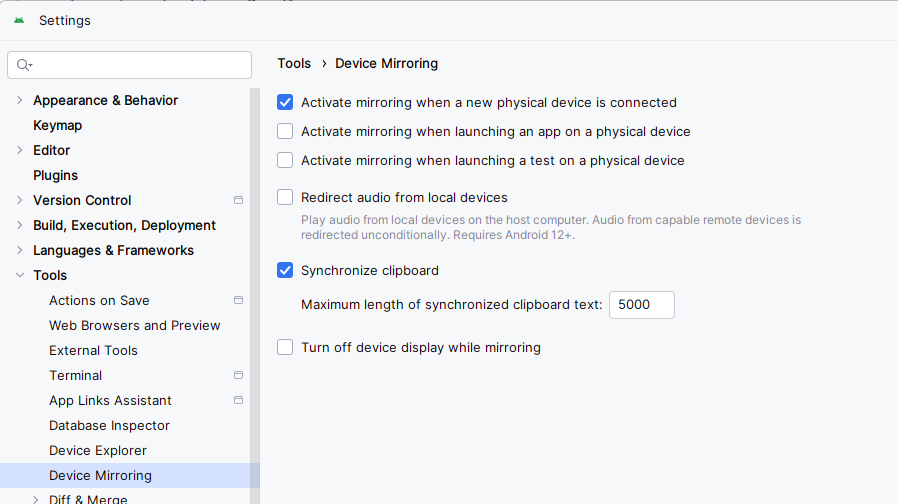
Mirroring the Device to Android Studio
If you want the device to display in Android Studio, as the emluator would you need to enable mirroring. Go to File->Settings->Tools->Device Mirroring, then check "Activate mirroring when a new physical device is connected"
Troubleshooting Tips
- Device Not Recognized: Check if the USB drivers for your device are installed on your computer. You might need to install or update these drivers depending on your device manufacturer.
- Connection Errors: Restart the ADB server with
adb kill-serverfollowed byadb start-serverin the terminal. - No Wireless Connection: Ensure both devices are on the same network and the correct IP address is used.
Conclusion
Connecting your physical Android device to Android Studio either via USB or wirelessly offers a realistic testing environment compared to an emulator. It allows developers to understand how applications will run in real-world conditions, including interactions with different device sensors and battery performance.
By enabling Developer Options and properly setting up connections in Android Studio, you can streamline your development process and ensure your applications perform well on actual devices.